Rooting Android Os
Posted On:
 Rooting is a process that allows users of mobile phones and other devices running the Android operating system to attain privileged control (known as "root access") within Android's Linux subsystem with the goal of overcoming limitations that carriers and manufacturers put on some devices. It is analogous to jailbreaking on devices running the Apple iOS operating system.
Most retail devices running the Android operating system must be rooted in order to install custom versions of the Android system such as CyanogenMod. This is because in the stock configuration (unrooted), user-installed applications do not have direct access to the flash memory chip on the device and, thus, are not able to replace or modify the operating system itself. Rooting is also necessary for certain applications and widgets that require additional system and hardware rights such as for rebooting the phone, certain backup utilities, and other access to other hardware such as status LEDs. Rooting is also needed to disable or remove manufacturer-installed applications such as City ID. Rooting the phone typically also includes installing an application called Superuser that supervises which applications are granted root rights.
For Example I will give the procedures how to root Sony Ericsson Xperia X8. U can ask for the procedures to root ur phone though ,So i will post the tutorials for that also.
Step 1
Back up your contacts and application to SD card before you upgrade your OS. Because when u upgrade the phone memory will be cleared. You can your backup contacts by selecting "Export to SD card" from the "Import/Export" which is in menu of contacts. You can use Astro fileManager(click to download) to take backup application.
U can backup it by selecting "Application manage/backup" from the tools which is available in the menu of AstroFileManger (click to download)
Step 2
Next we need to download some tools and files to root your X8.
It includes two apk
1)Busybox (click to download)
2)Xrecovery (click to download)
And the x8 rooter,i.e, Flash tool (click to download)
Step 3
Next What you need is an Custom Cyanogen Rom;You can download any among the below, But recommend you to download Floyo.
This is the rom available for X8
1)Floyo-0.30 (click to download) a Custom Froyo (Recommended)
Working : Everything.This rom is really fast and has no bugs (?)
Based on FroyoBread(0.12)by doixanh (thanks!) + circle battery with %
fixes : sense theme, mpeg4 video-recording,wifi (wpa2+adhoc), some others.
Bugs: autobrightness might be dark, not sure yet why. At least its not completely dark.
2)2.3-Sense0.15 (click to download) a Custom Gingerbread
Fixes : Sound, GSM (calls/sms),Sensors (Proximity etc),Bluetooth,some 2d.
Not done : 3d, wifi,3G,vibra
3) Srom-2.3.3Gingerbread v2 (x8)(Click to see tutorials) Custom Gingerbread
Features: Miui Camera,Miui Music,Wifi,Video recording (Videocam Illusion),Audio Recording (Not stock)
Xperia Arc launcher,Honeycomb theme,Bluetooth,Audio Mixer,Offline Charging,Headjack detection
Sensors,GPS,Compass, Vibration,Fake Dual Touch (2 finger support),Gingerbread App2sd native
Google music 3.0,Astro File Manager,GMaps 5.30,New app icons (SE style),Removed overclock,Added Mddi lag fix,Added arc timescape,Added calculator,Added new dualtouch v005,New statusbar icons
4)GingerDX V018 (X8) (Click to Download)
Step 4
After downloading every above files Transfer the Busybox (click to download) to your X8 and install it.(You may not able to install it because,ur mobile may be disabled to install non market apks, to enable goto Menu--> Settings--> Applications, and enable the check box Unknown Source ) and enable Usb Debugging mode in settings -->applications -->devolopment.
Step 5
Create a above folder tree in desktop.

Step 6
Connect your phone to ur pc with usb cable(Don't mount SD card)(don't make usb debugging mode busy by other application like pdanet or any while you connect to pc). Then go to folder flash and double click x10flashtool.exe. After entering to it asks you to select ur device from a radio button menu. Select X8 from it and check for ur mobile details shown in the window.You ll get a similar page like this there.
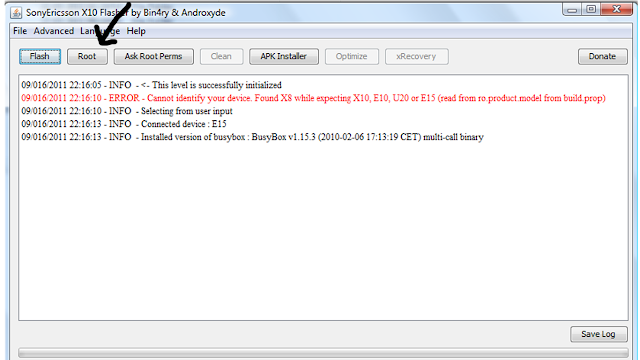
Click the root Button in the window....
Your phone may restart...Dont worry..its natural..Congrats..Ur phone is rooted now
Step 7
After this transfer and install Xrecovery (click to download) in your X8. Then switch off your mobile and switch on it. When it displays Sony Ericsson in the screen,press back button multiple times. This will take you to xrecovery menu. The Menu look like this.(Use volume key to navigate and middle button for OK)
Then Select Backup and Restore.
Select backup for creating a backup of your Original Sony Ericsson os.This will take few minutes.
After completing navigate to main menu and select the first option to restart your device.
Step 8
The backup of the os will be present in SDcard--> Xrecovery -->backup.,You can Move this into ur PC and make it secure in PC.,Next transfer the folder in os folder we created in to SDcard--> Xrecovery -->backup. Then exit your file manager and restart the device again. Press back key as before and select Backup and Restore. Now select restore and restore the floyo from it...This process will complete in few minutes..
Enjoy your new os..
Share:
About The Author:

Mohammed Sijas
Mohammed Sijas is Software developer and Founder of Droid Terminal with a sound experience of 6 years in Web and Mobile Technologies.